A quick overview of getting an image from the camera, or the photo library.
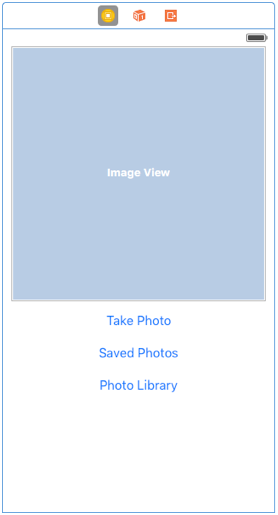
First, set up your view in the interface builder. For this example, I'm keeping it really simple with a UIImageView and 3 buttons.
Update the UIViewController for your view to import MobileCoreServices (contains the constants required for defining what we want from the picker). Also, add support for the protocols we will need for our view controller to serve as a delegate on the picker. If you have created a new project, this will be ViewController.swift.
import UIKit
import MobileCoreServices

class ViewController: UIViewController {

}

extension ViewController: UIImagePickerControllerDelegate {

}

extension ViewController: UINavigationControllerDelegate {

}
Note that I've taken advantage of Swift's protocol extensions to keep my delegate handling code separate from the rest of my application code. This helps keeps things logically grouped and makes it easier to keep it tidy. I'm not interlacing different contexts which will make it easier to read if I come back to it months later.
Add the user interface code. We're going to get a reference to the UIImageView so we can update it. We'll also hook up actions to the buttons so we can trigger the desired behaviour.
class CameraViewController: UIViewController {
    @IBOutlet weak var imageView: UIImageView!

    @IBAction func displayCamera(sender: UIButton) {
        displayImagePicker(.Camera)
    }

    @IBAction func savedPhotos(sender: UIButton) {
        displayImagePicker(.SavedPhotosAlbum)
    }

    @IBAction func photosLibrary(sender: UIButton) {
        displayImagePicker(.PhotoLibrary)
    }

    func displayImagePicker(sourceType: UIImagePickerControllerSourceType) {
        guard UIImagePickerController.isSourceTypeAvailable(sourceType) else {
            return
        }

        let imagePicker = UIImagePickerController()
        imagePicker.delegate = self
        imagePicker.sourceType = sourceType
        imagePicker.allowsEditing = false
        imagePicker.mediaTypes = [kUTTypeImage as String]
        presentViewController(imagePicker, animated: true, completion: nil)
    }

    func handleImage(image: UIImage) {
        imageView.image = image
    }
}
A quick description of what's here:
@IBOutlet allows us to connect a component from Interface Builder - just display the source code side-by-side with the Interface Builder view and Ctrl+Drag to connect them. If you drag to an empty space in your code, Interface Builder will prompt you to create an @IBOutlet, or @IBAction.
@IBAction allows us to connect an action on a component in Interface Builder. In this case, Touch Up Inside to define a touch event ending (lift up) that occurred inside the relevant component. As with @IBOutlet, Ctrl+Drag to connect the Interface Builder view to the source code.
The UIImageView, imageView, is defined as a weak reference as the reference will be held for us by the view so we don't need a strong reference in our UIViewController under most circumstances. Doing so can, in fact, lead to memory problems. We don't need specific references for the buttons since we don't need to access, or change, their state.
The @IBAction prefixed functions will trigger when the relevant button is pressed. I've included the button as a parameter, though this isn't necessary for this application, as it can be useful in other cases and is included by default if you let Xcode create the method for you. These methods just call a helper with an appropriate parameter for the source we want to get an image from.
displayImagePicker(sourceType) is a method that creates, and displays, the image picker. This just lets us reuse code that we'd otherwise have to include in all 3 of our IBAction methods since the only change, in this example, is the sourceType. Other than the image picker, the only notable addition is the use of a guard-statement to check if the source type is available. For this I'm just returning if it's not, but a more complete application might display an error message here.
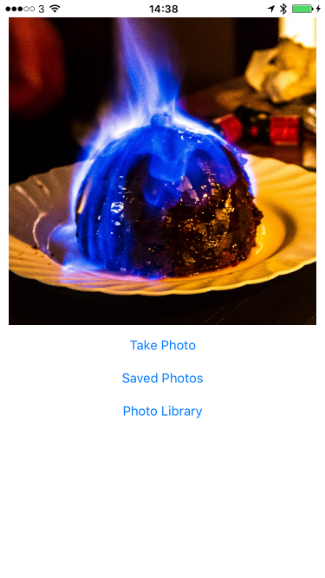
handleImage(image) takes a UIImage as a parameter and updates the imageView to display it. This is nice for a test but of minimal use otherwise.
This code will run but will not do much because we don't currently handle the image retrieval. Nothing is calling the handleImage(image) method yet. Update the UIImagePickerControllerDelegate protocol extension like so:
extension ViewController: UIImagePickerControllerDelegate {
    func imagePickerController(picker: UIImagePickerController, didFinishPickingMediaWithInfo info: [String : AnyObject]) {
        dismissViewControllerAnimated(true, completion: nil)
        let mediaType = info[UIImagePickerControllerMediaType] as! String
        if mediaType == kUTTypeImage as String {
            let image = info[UIImagePickerControllerOriginalImage] as! UIImage
            handleImage(image)
        }
    }
}
All we're doing here is handling the UIImagePickerController being dismissed and retrieving the image, if the media type is an image. It should be since we've requested that only image types be allowed but I've included the check in case you want to extend this to handle video in the future.
Note that, whilst we do need to declare that we support the UINavigationControllerDelegate protocol to assign our view controller as the delegate of the image picker, we don't need to handle any of the callbacks so we can leave this blank for now.
Run the app. It's better on a real device since the simulator doesn't support the camera, but the photo library should be accessible on both (privacy restrictions permitting).
Get the source code here: https://gist.github.com/stepheng/1562ca7834ee84f1a64a